Modelling Chocolate Micro Flower Tutorial

Micro modelling chocolate flowers

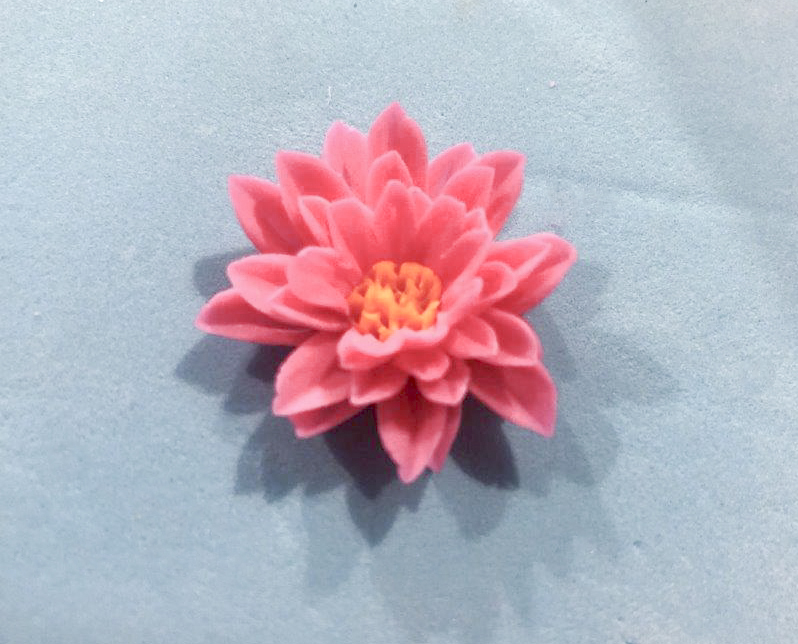
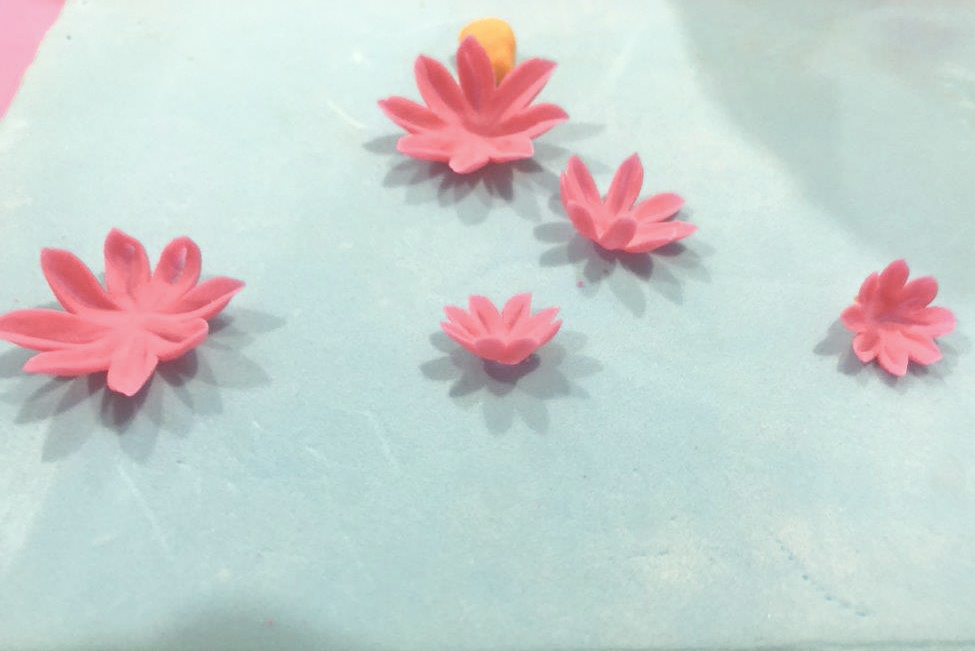
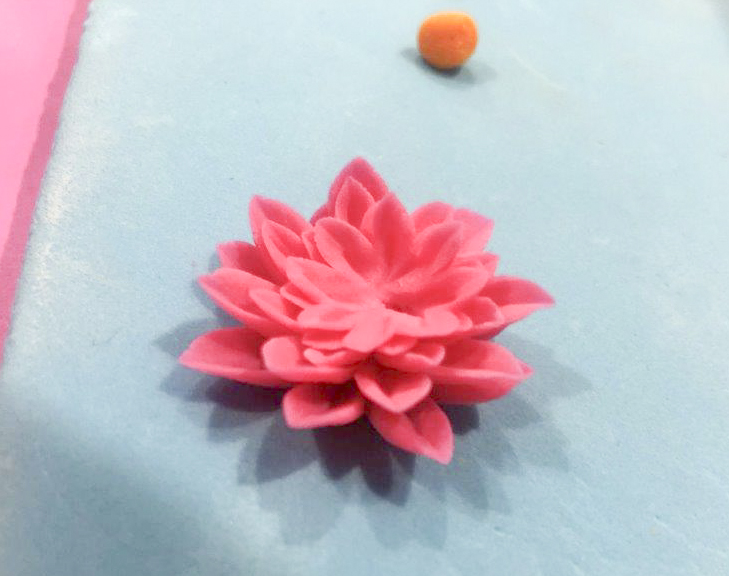
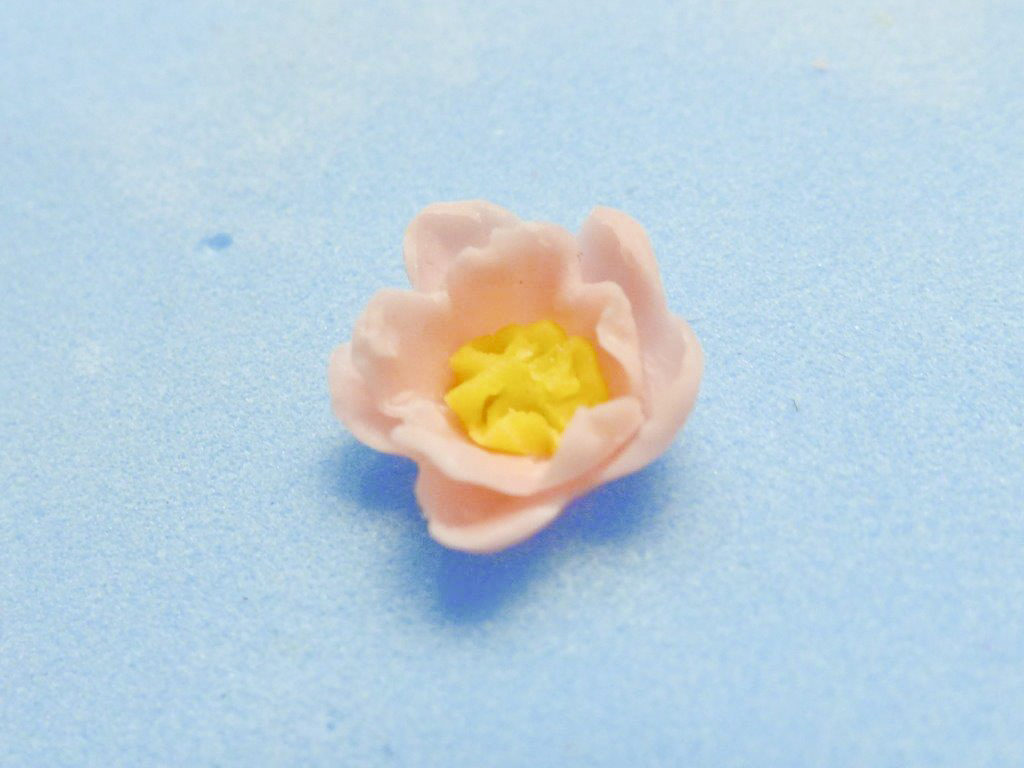
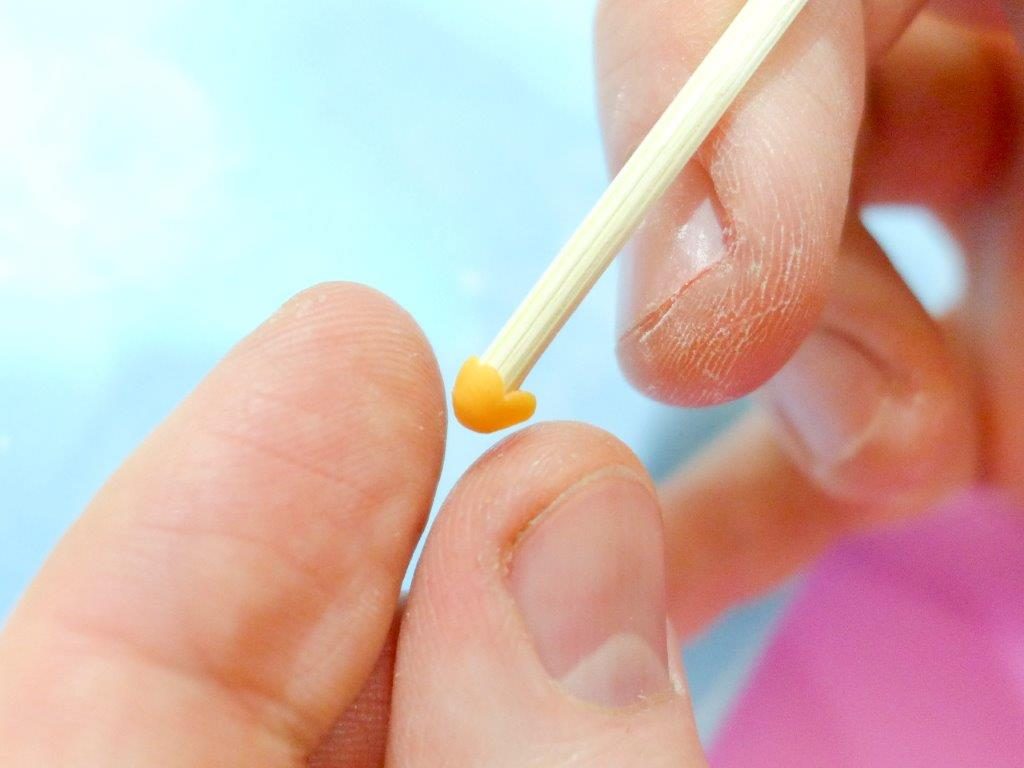
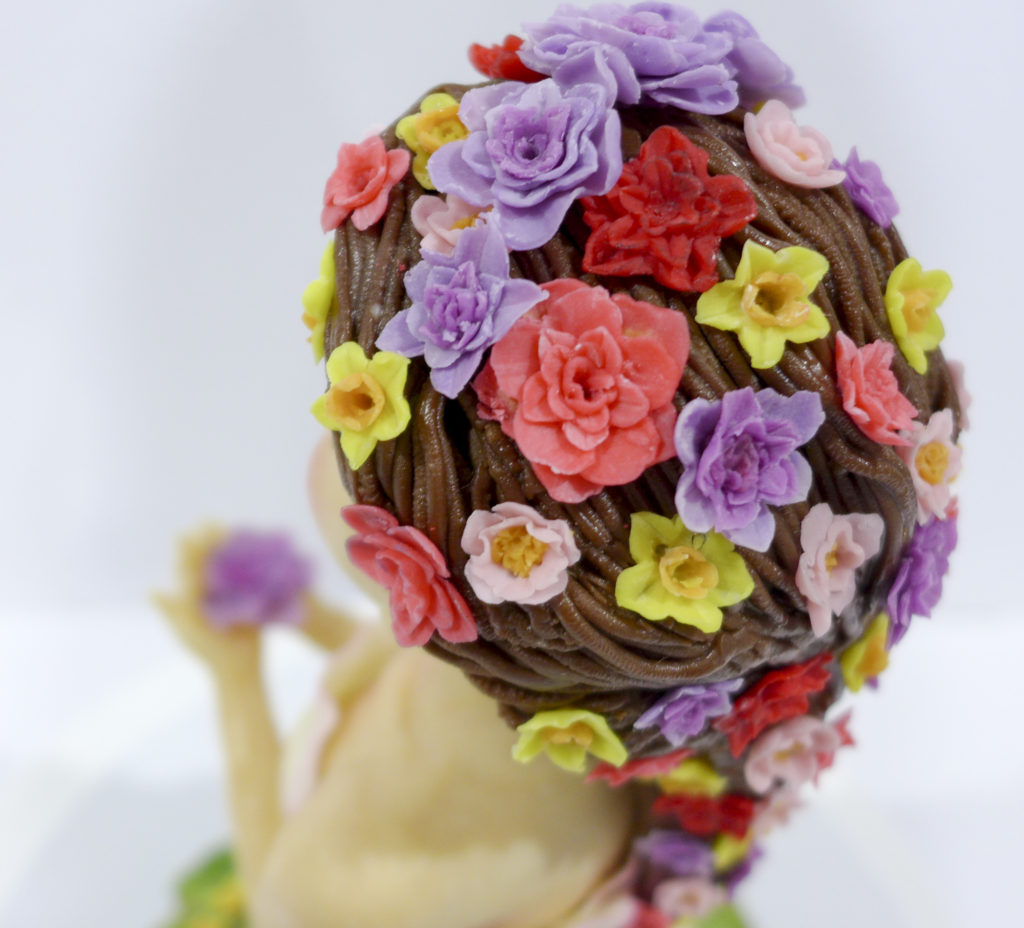
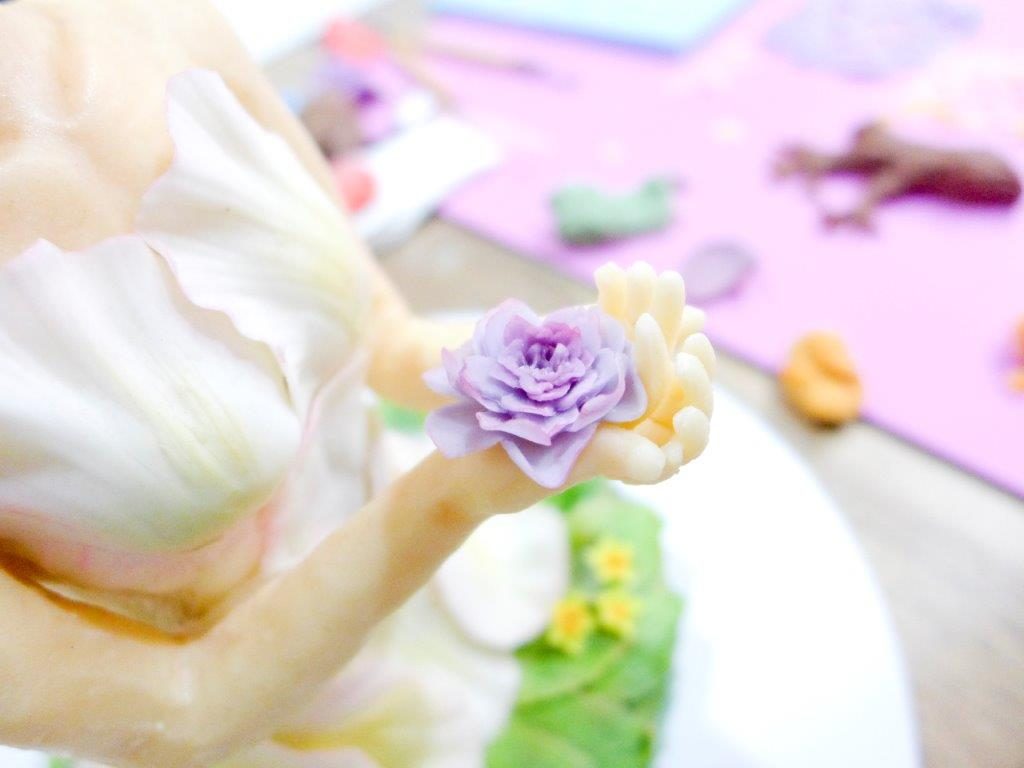
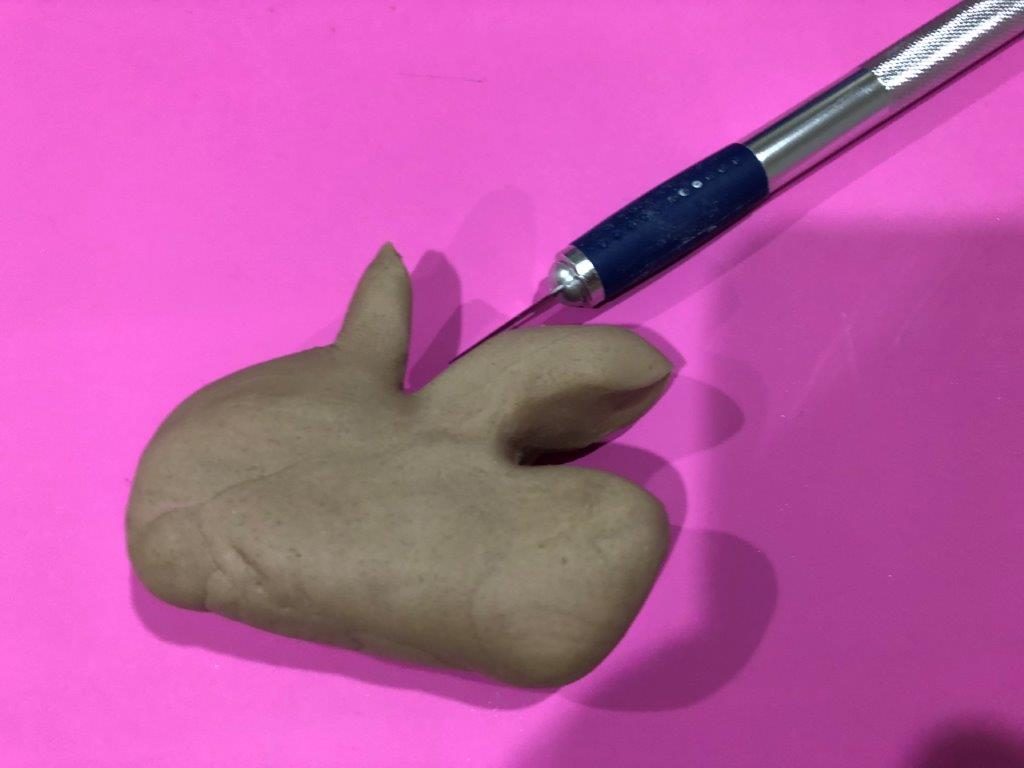
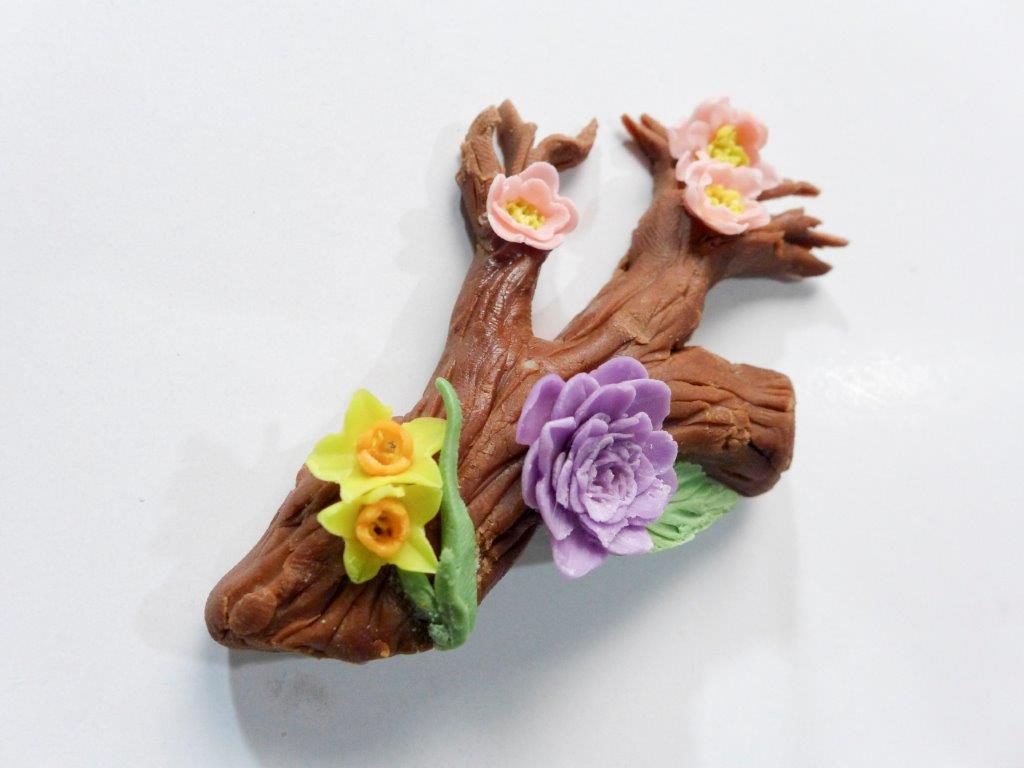
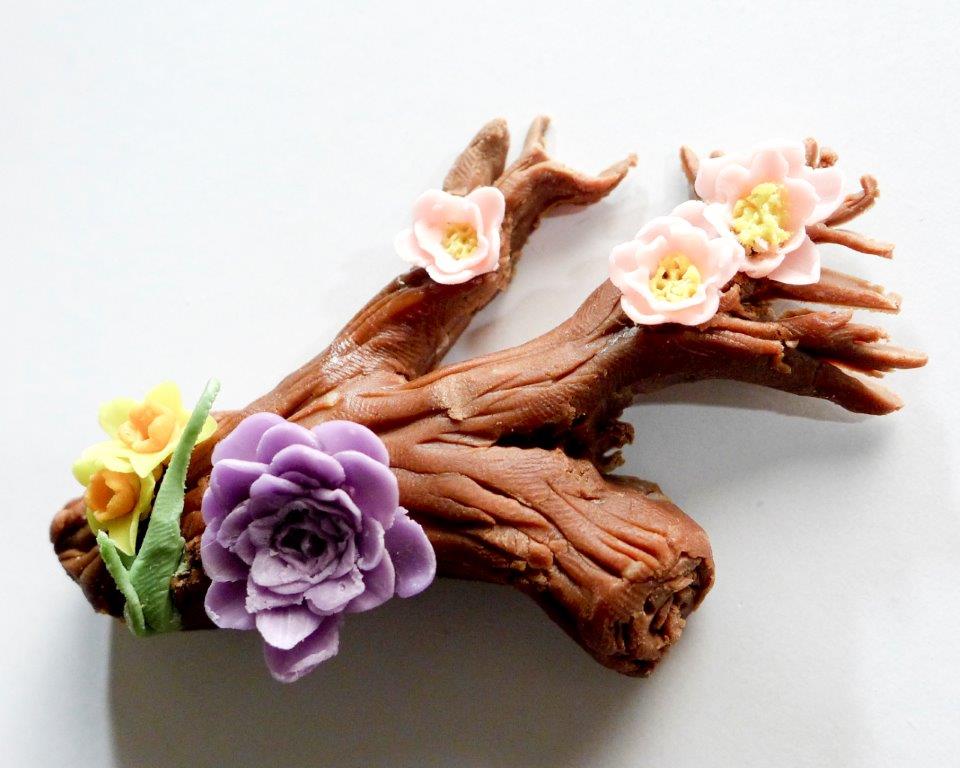
Micro flowers are a handy additional decorating skill to have. They are great to use as an accent on a name plaque, or in a small cluster on decorated cakes and cupcakes, they are also an easy way to add more detail to chocolate and sugar sculptures.

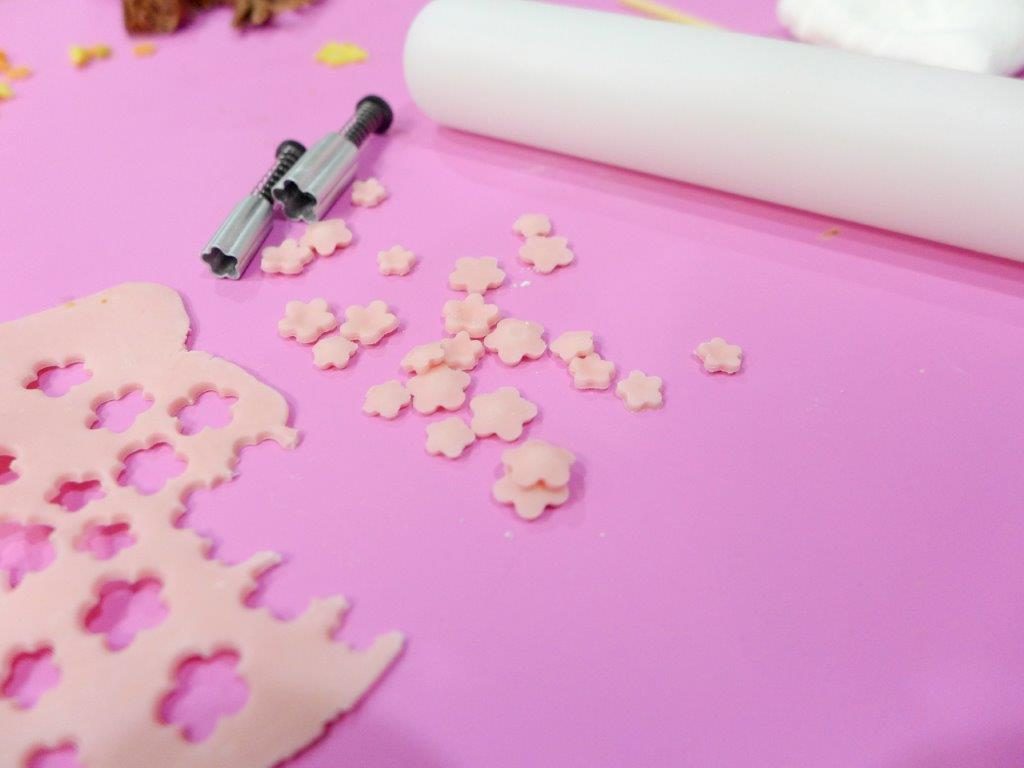
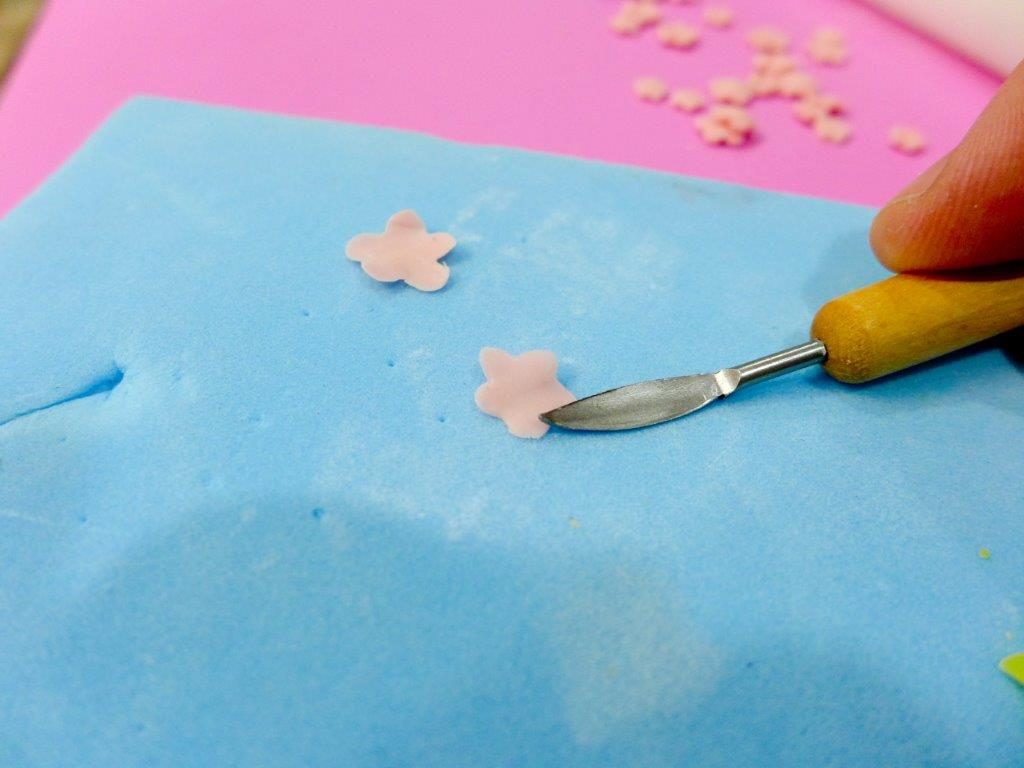
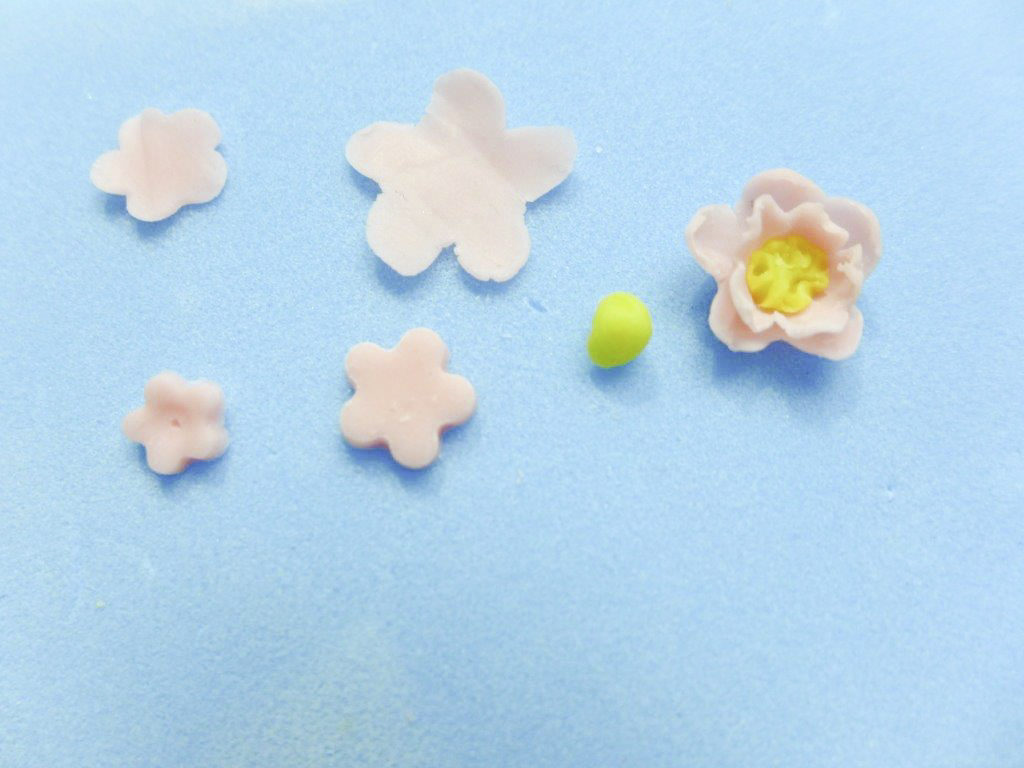
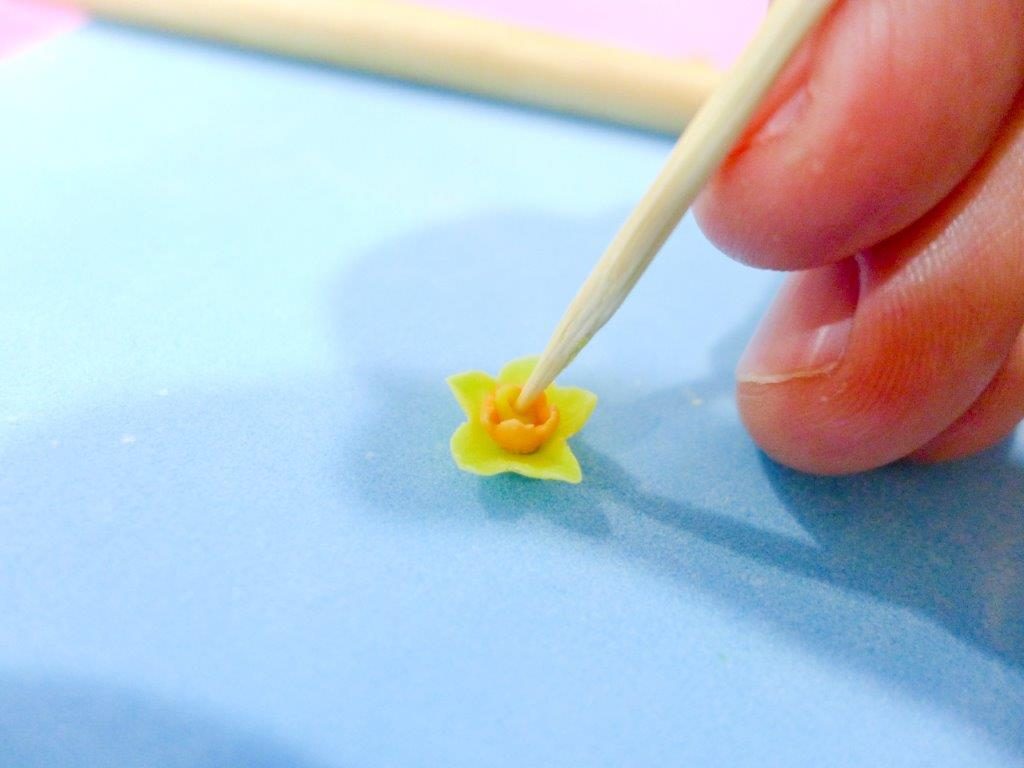
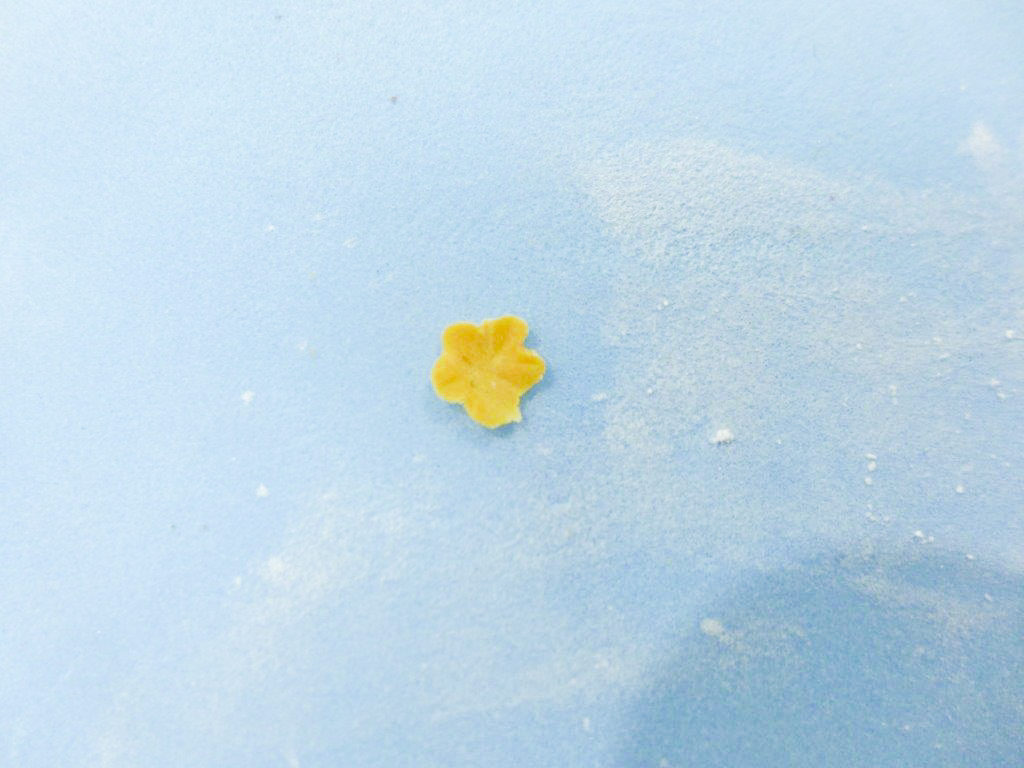
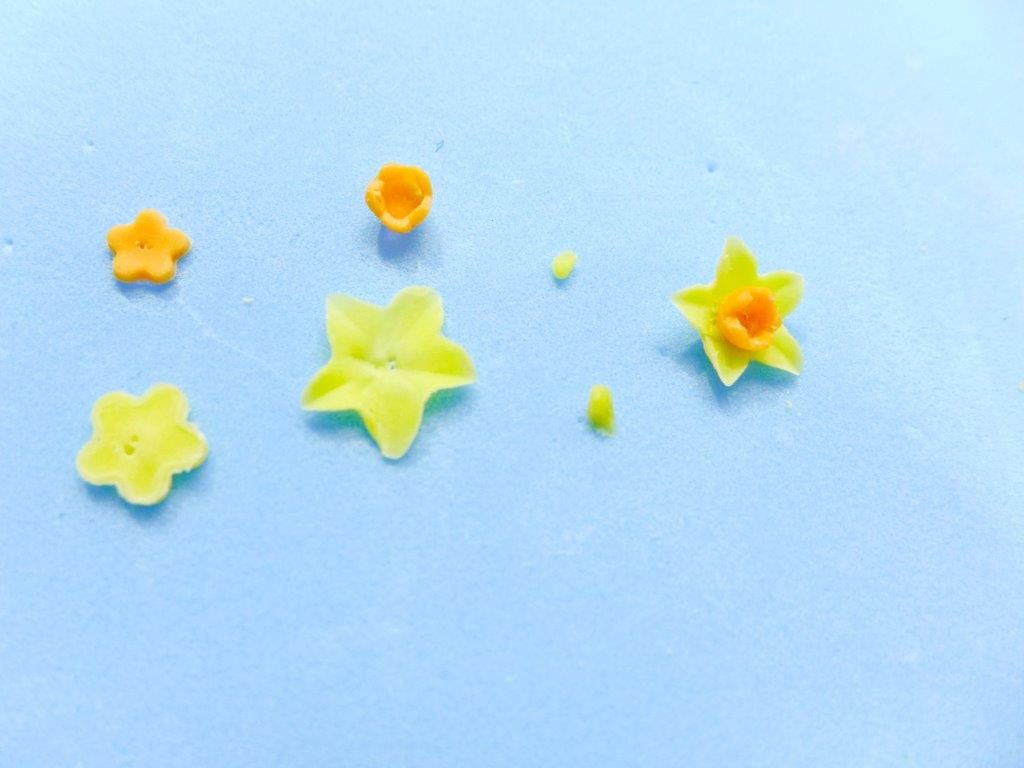
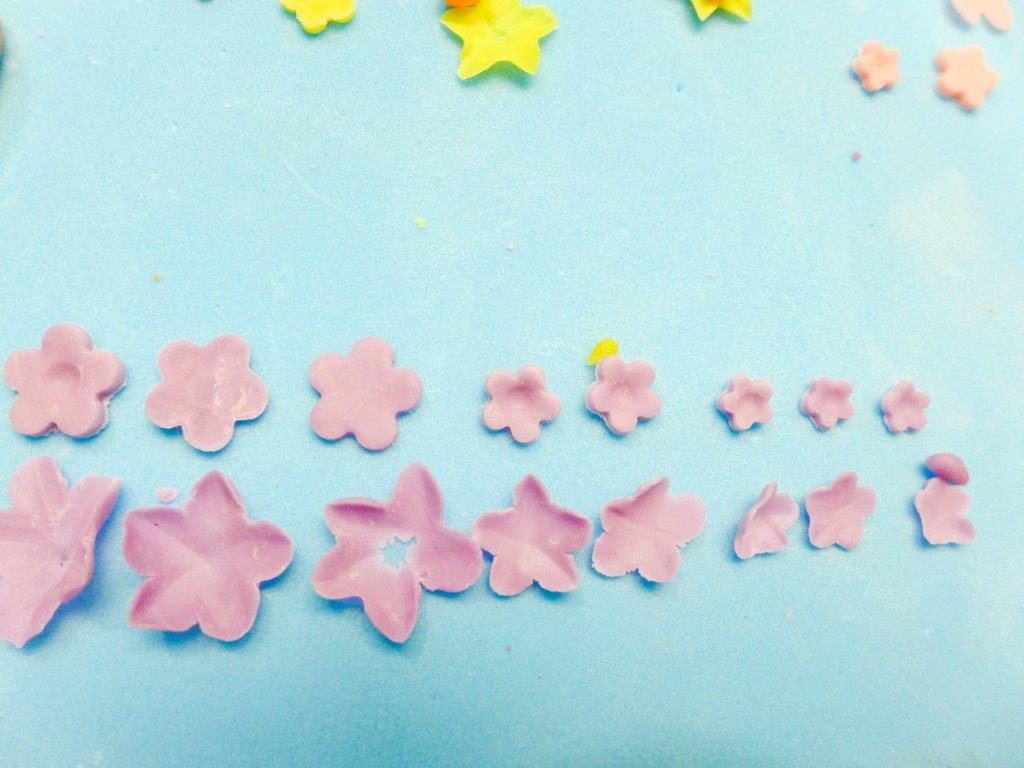
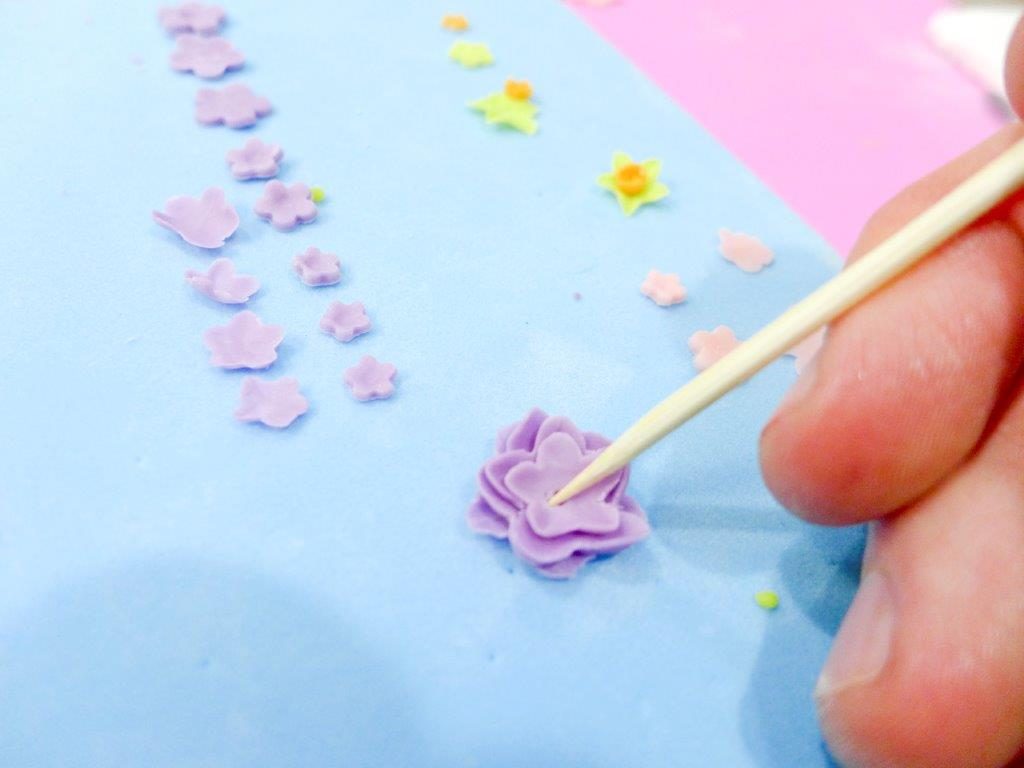
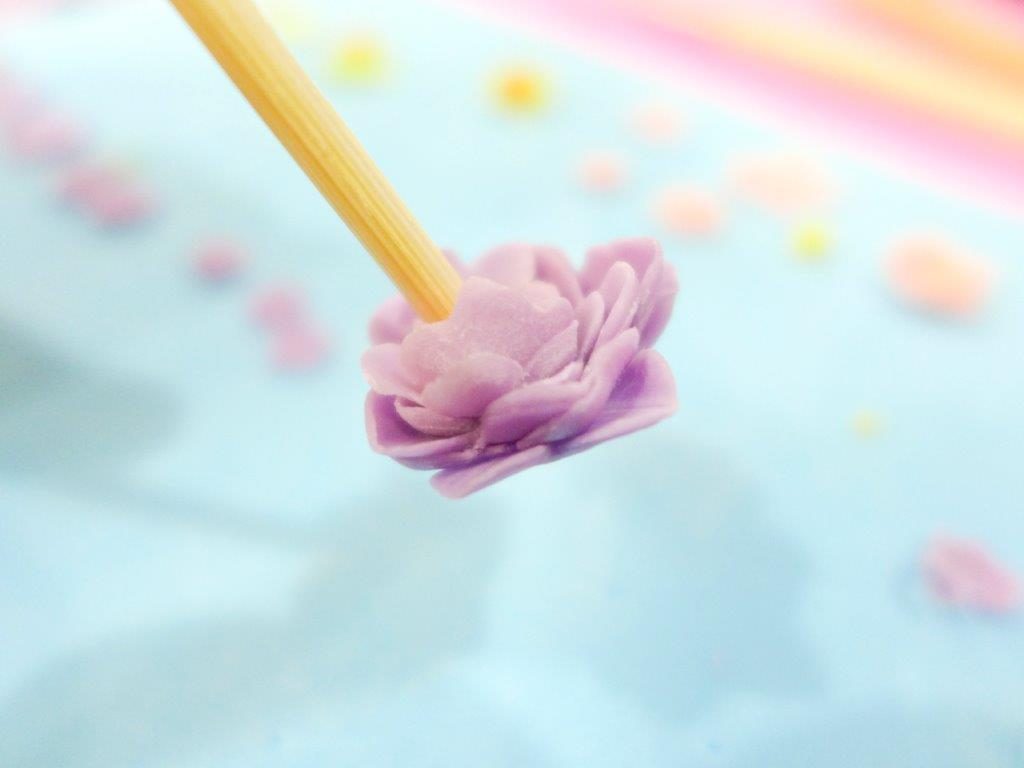
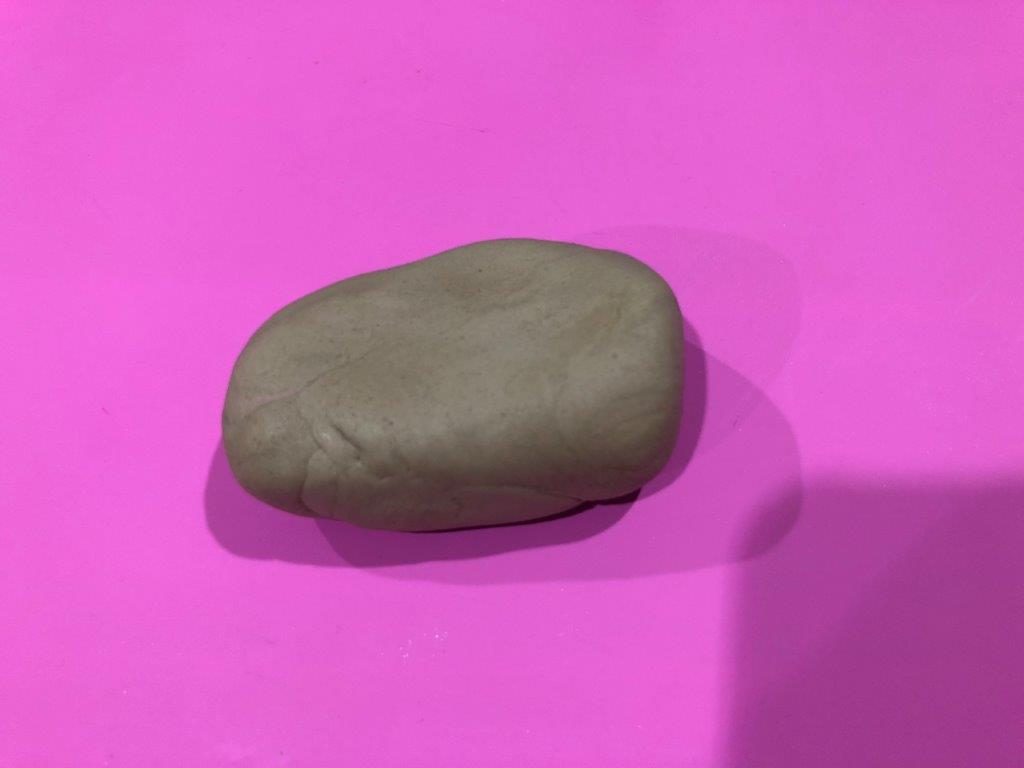
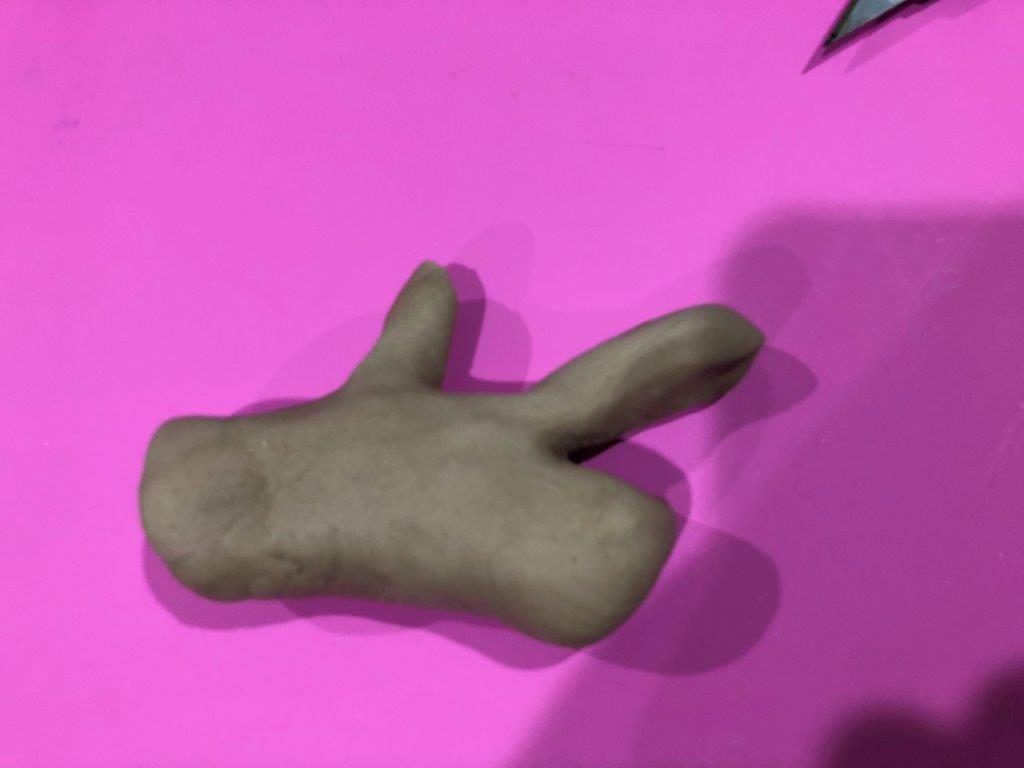
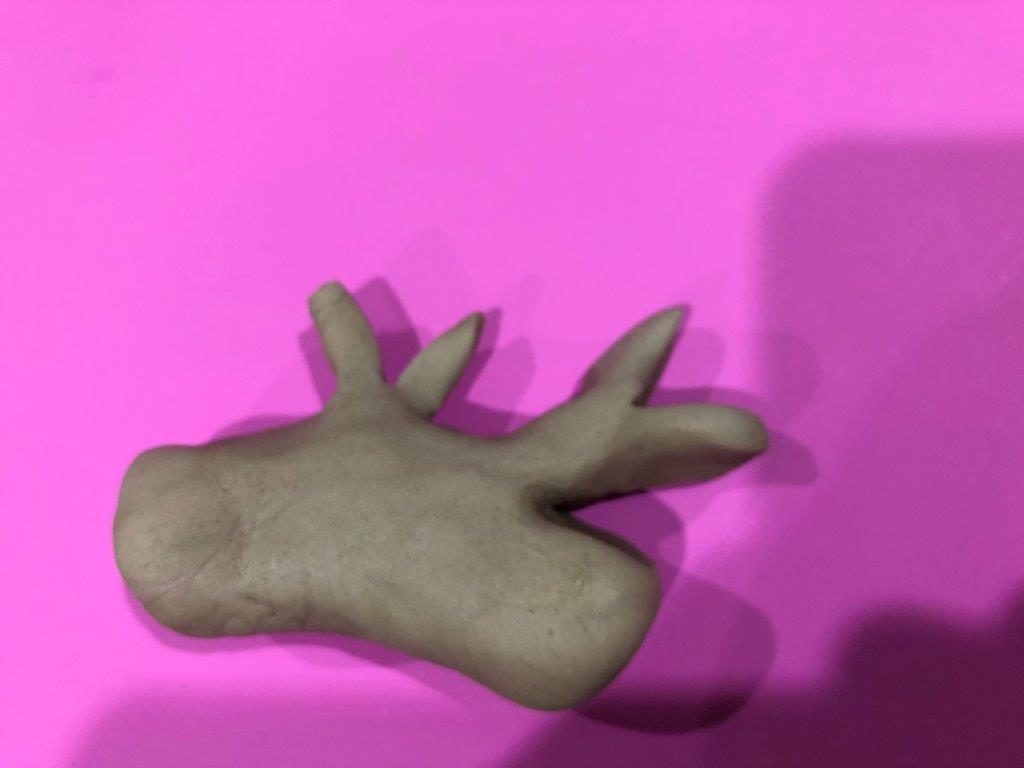
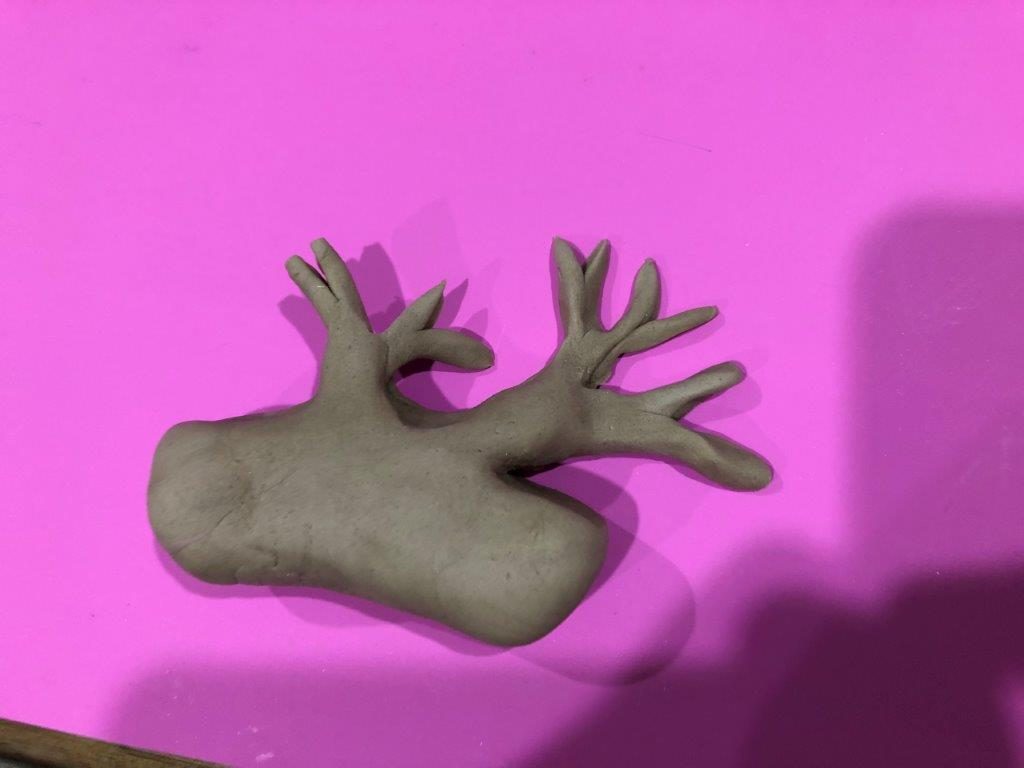
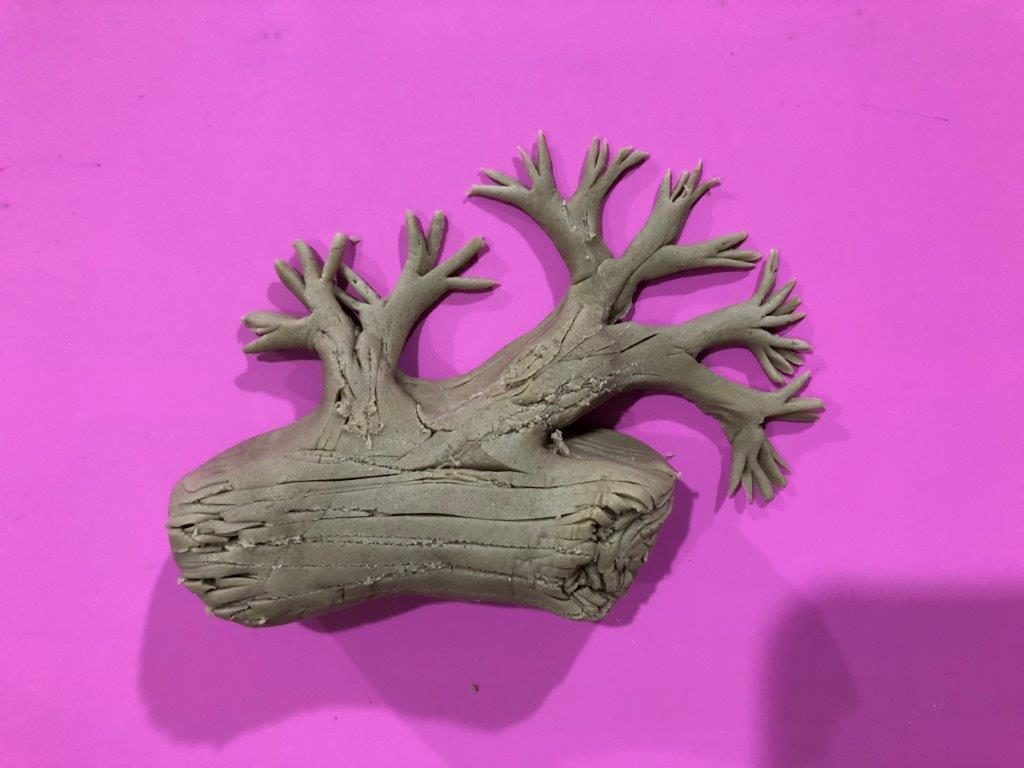
All the flowers shown below are very basic, despite looking quite detailed and being less than 2cm wide. They can be scaled up to make medium sized fast filler flowers or to use as single flower cupcake toppers. All the examples here are made from homemade modelling chocolate, but the same techniques work in sugar paste, but the sugar paste needs time to set, and chocolate doesn’t. I like to make them in chocolate because there is no drying time, it makes them much faster than sugar flowers, and they are nicer to eat than sugar flowers.
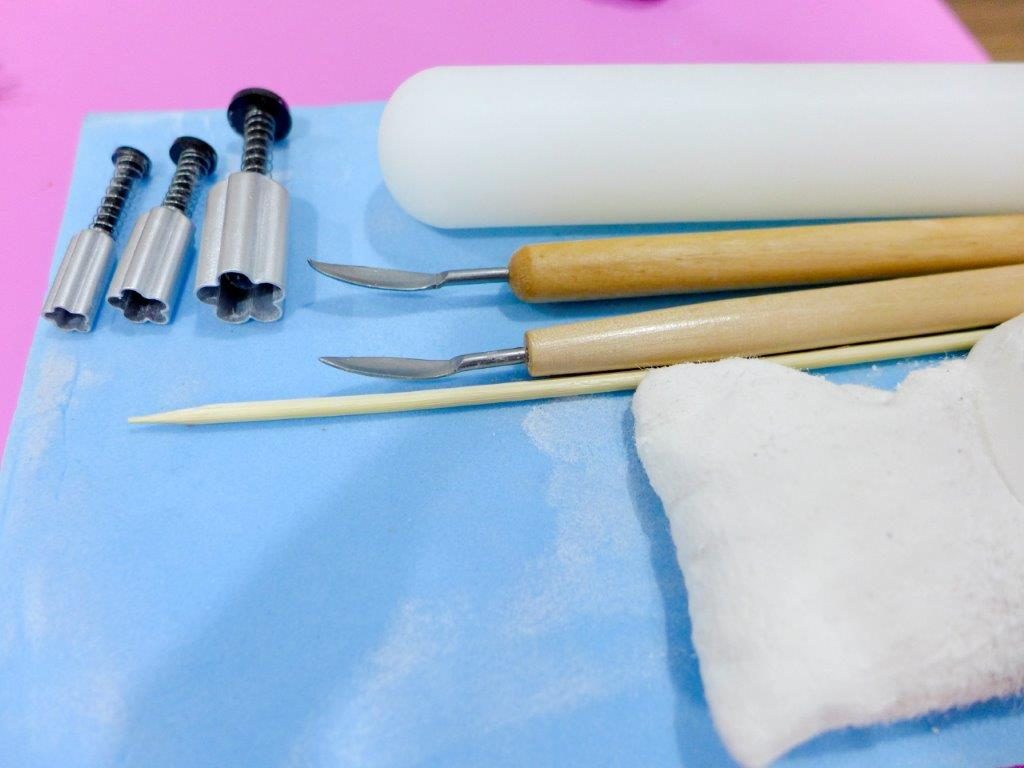
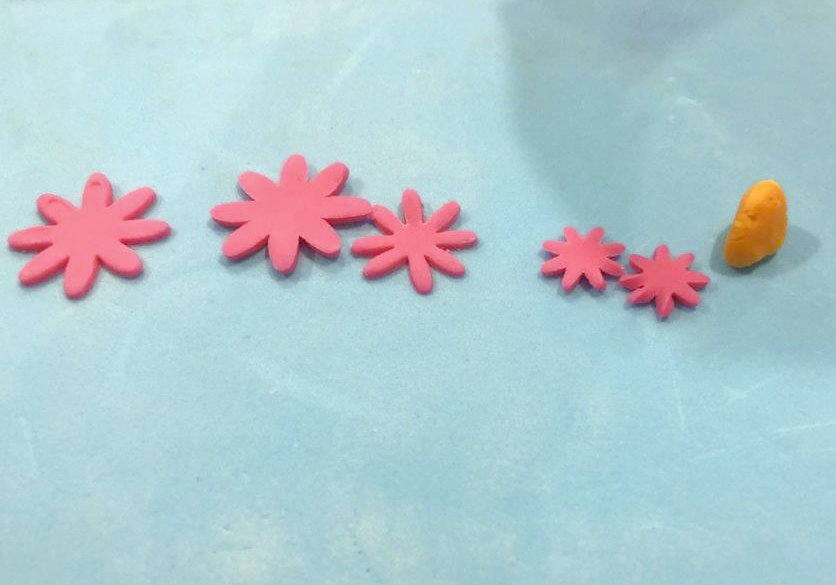
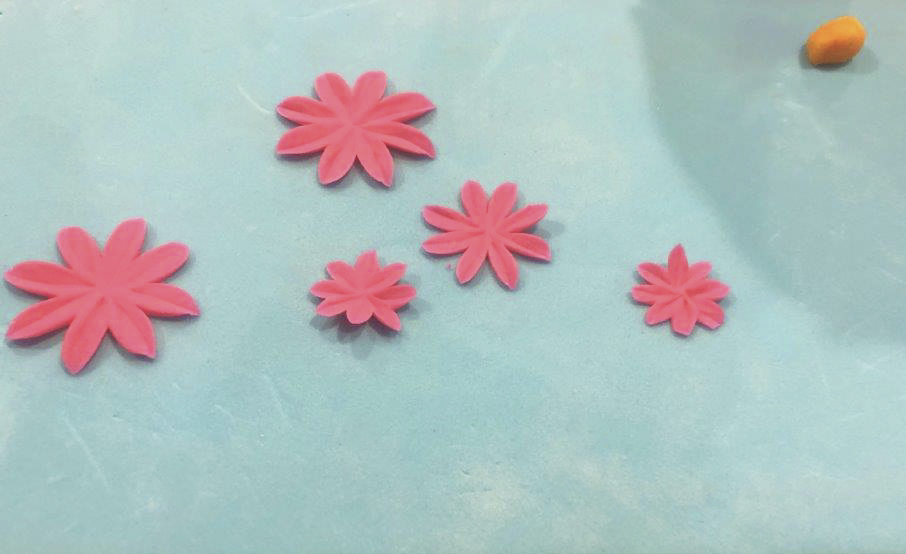
Using very basic tools, and just one kind of blossom cutter, a lot variation can be achieved by stretching the petals out round and flat, or to a point with a sculpting tool and even more variation can be achieved by using different colours and varying how the petals are stacked together.
My recipe for modelling chocolate can be found here: http://v90.73b.myftpupload.com/modelling-chocolate-recipe/

Tools: 

Basic clay sculpting tools – Cheapest kit from the craft section of a discount craft shop or the spoon-shaped end of a Dresden tool will do.
Small blossom cutters in three sizes
Small nylon rolling pin
Foam petal pad
Cornflour dusting bag
Bamboo skewer
Homemade modelling chocolate coloured with gel paste colours

Modelling Chocolate Micro Flower Tutorial | All the examples here are made from homemade modelling chocolate, but the same techniques work in sugar paste, but the sugar paste needs time to set, and chocolate doesn’t. I like to make them in chocolate because there is no drying time, it makes them much faster than sugar flowers, and they are nicer to eat than sugar flowers | https://robertscakesandcooking.com/micro-modelling-chocolate-flowers/
Roll the chocolate into very thin sheets. Generously flour the top and bottom of the chocolate to stop it from sticking to the bench or the rolling pin. Modelling chocolate is very brittle when it’s cold, so before shaping petals, warm them for a second or two by laying them on your palm so that they are flexible enough to shape.  

Lotus

Use a small sized daisy cutter set to cut out 2 large , 1 medium and 2 small petals.

Gently warm the petals with your hands for a couple of seconds before shaping to make them flexible, or they may break.

On a foam mat, use a flat pointed tool dipped in cornflour or the tip of a skewer held quite flat to the surface to shape the petals. 

Drag the tool from the middle of each petal to the tip to give it shape and leave it with a pointed tip

Drag the tool back from the tip of each petal to the middle to make the petals curl inwards.

Stack the petals from largest to smallest then press into the centre of the petals with the well floured butt of a skewer or small brush to lock the petals in place and create shape. 

Warm up a small ball of chocolate in your hands and drop it in the centre of the flower. Use a well floured dresden tool or the sharp side of a skewer to stipple the centre of the flower and lock all the petals in place.

Apply the flower by heating a small ball of chocolate with your hands press it onto the surface you want to attach a flower to then press the flower in place by applying pressure to the flower centre with a skewer.
Re-stipple the middle of the flower to finish.


Basic Camelia:

Soft pink and yellow modelling chocolate

1. Cut one of the smallest and one of the medium sized blossom shapes from the modelling chocolate that has been rolled into a thin sheet.

2. Use hands to warm the petal a little to make it easier to flatten and shape the petals. Place on the foam pad and thin the petals by applying gentle pressure with a sculpting tool from the inside to the outside edge, keeping the tool flat and level to create flat rounded petals.

3. Pull the sculpting tool across the petal in the other direction – from the outside to the middle of the petal to curl the edge and create some shape.

4. Roll one tiny ball of yellow, heat it with hands and use it to stick the two rings of petals together.

5. Warm a second small ball of yellow and push into the centre of the flower, pressing towards to middle of the flower to create shape.Stipple the yellow part with a bamboo skewer this locks the petals together and creates a pollen-like texture in the centre.

Attach the flower to a surface with a small ball of warmed up modelling chocolate, press it into place by pressing on and stippling the yellow centre with a skewer.

Change the colours to soft pink for the petals and a much darker nearly maroon pink for the centres to make cherry blossoms instead.

Daffodil:

Roll out orange (half orange and half yellow colouring mixed to make a softer orange colour) and cut the smallest sized blossom shape for the centre. Cut medium sized blossom shapes from the yellow chocolate for the surrounding petals.

Flatten the centres working around the edge.
Shape into a bell shape around the blunt end of a bamboo skewer that has been lightly dusted with corn flour.

Place a yellow blossom shape on the petal pad, drag the sculpting tool from the centre to the edge of each petal, dragging the point right to the edge increasing the angle towards the edge to create a pointed petal.

Roll a small ball of yellow chocolate, melt it with your hands then place it between the flower centre and main petals, gently push down with a well dusted skewer through the middle of the flower centre.

Add another ball of yellow to the middle of the flower and stipple the middle of it to lock it in place and create an attractive looking centre.

Completed daffodil.

Full blossom:

Cut 2 large, 2 medium and 2 small sets of petals, from purple modelling chocolate.

Thin the edges, keeping the sculpting tool flat to give rounded petals.

Shape the petals by pulling the sculpting tool back across the petal from the outside to the inside. Roll small balls of chocolate, heat them with your hands and use them to fix sets of petals together.

Press each layer together, applying pressure with the butt of a well-floured skewer from the centre to fix the petals together and make them curve into more of a bowl shape. Press the final ball into place and stipple the centre with a the pointed end of the skewer to finish locking the petals in place and create an attractive centre.


Branch

Roll a wedge shaped ball of brown modelling chocolate.

Cut into the ball to free up two main branches. Shape and round the branches. Cut each branch into smaller branches, thinning and shaping the branches each time, continue until the branches are too small to cut further. Finish the tips of the branch by making them thin and pointed.
Roughly mark the bark with the sharp tip of a skewer or the blunt side of a scalpel.
Decorate with micro flowers and foliage.

Modelling Chocolate Micro Flower Tutorial | All the examples here are made from homemade modelling chocolate, but the same techniques work in sugar paste, but the sugar paste needs time to set, and chocolate doesn’t. I like to make them in chocolate because there is no drying time, it makes them much faster than sugar flowers, and they are nicer to eat than sugar flowers | https://robertscakesandcooking.com/micro-modelling-chocolate-flowers/

2 comments

1 ping

    • Danielle on 6 June 2018 at 8:34 am

    Wow – So much detail can be achieved with these flowers. Great step by step guide and the tools are easy to source as well.

    1. Thanks, glad you like it. I always aim to make tutorials that are easy for anyone to follow, without the need for crazy tools or unattainable ingredients.

  1. […] Tutorial for micro modelling chocolate flowers can be found here:https://robertscakesandcooking.com/micro-modelling-chocolate-flowers/ […]

Comments have been disabled.