
 The pastillage recipe after the photos is extremely simple and cheap to make. I’ve found it fairly easy and pretty reliable. The recipe is essentially an old fashioned version of pastillage. I have been using this recipe for years to create everything from sugar paste flowers to simple figurines. Best of all it is gluten free and has just three ingredients and water, all of which you can get at any supermarket. This is perfect for structural pieces like the soles and heels of sugar shoes, wired centres for sugar flowers or very thin structural decorations.
Because of how fast this mix dries I do not recommend it for flower petals or for super detailed modelling. Mexican paste, fondant or modelling chocolate are better options, however this does create a paste that sets super hard like concrete, is super strong and you can even file or sand it to smooth pieces.
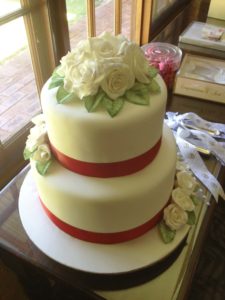
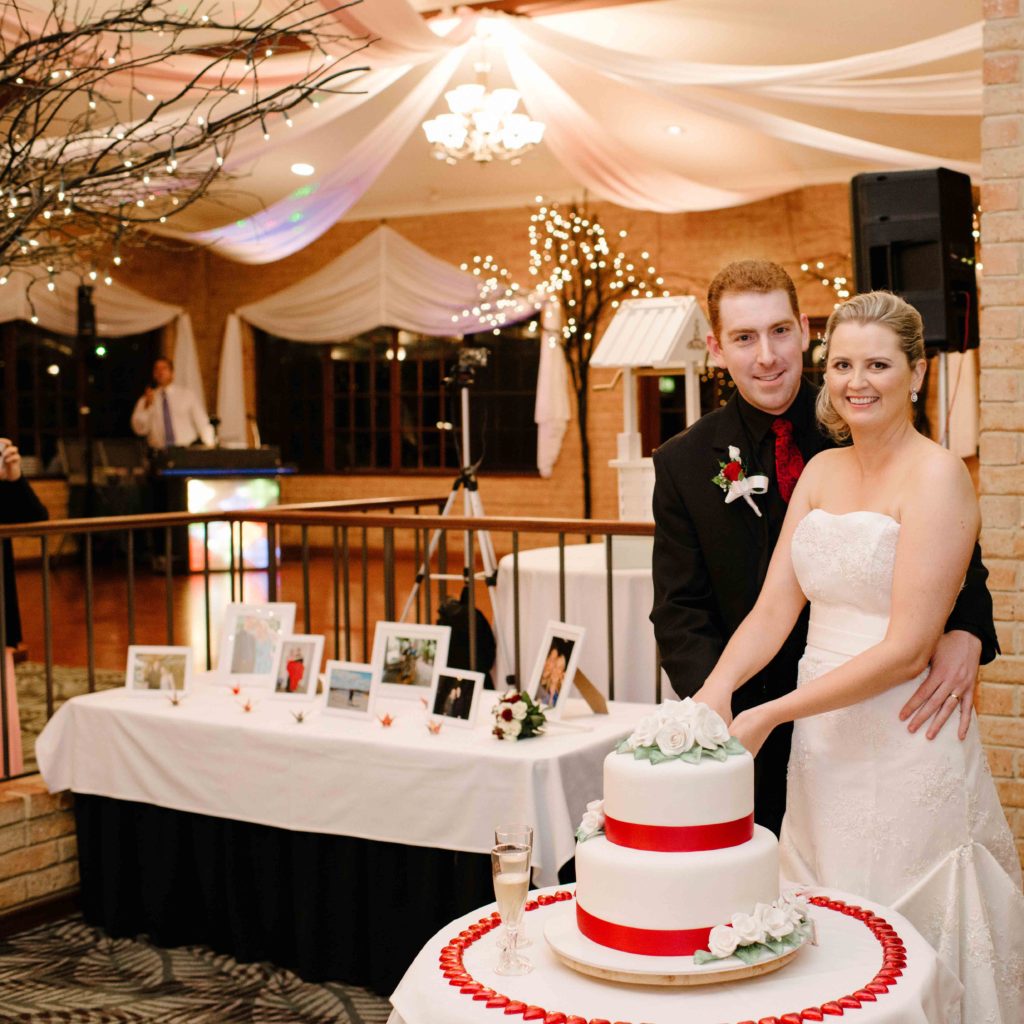
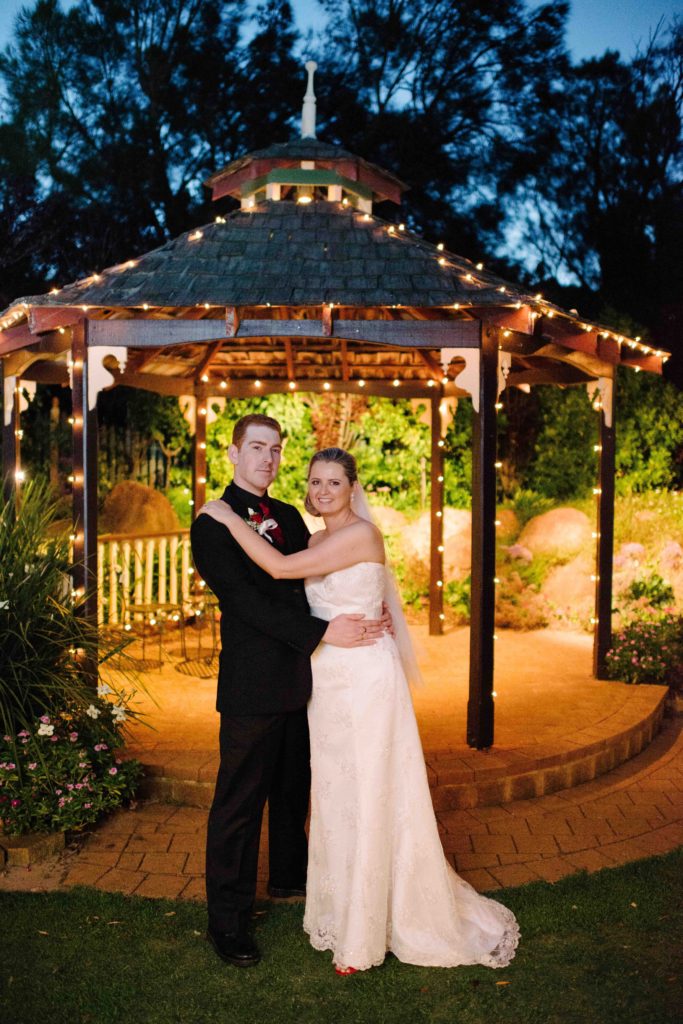
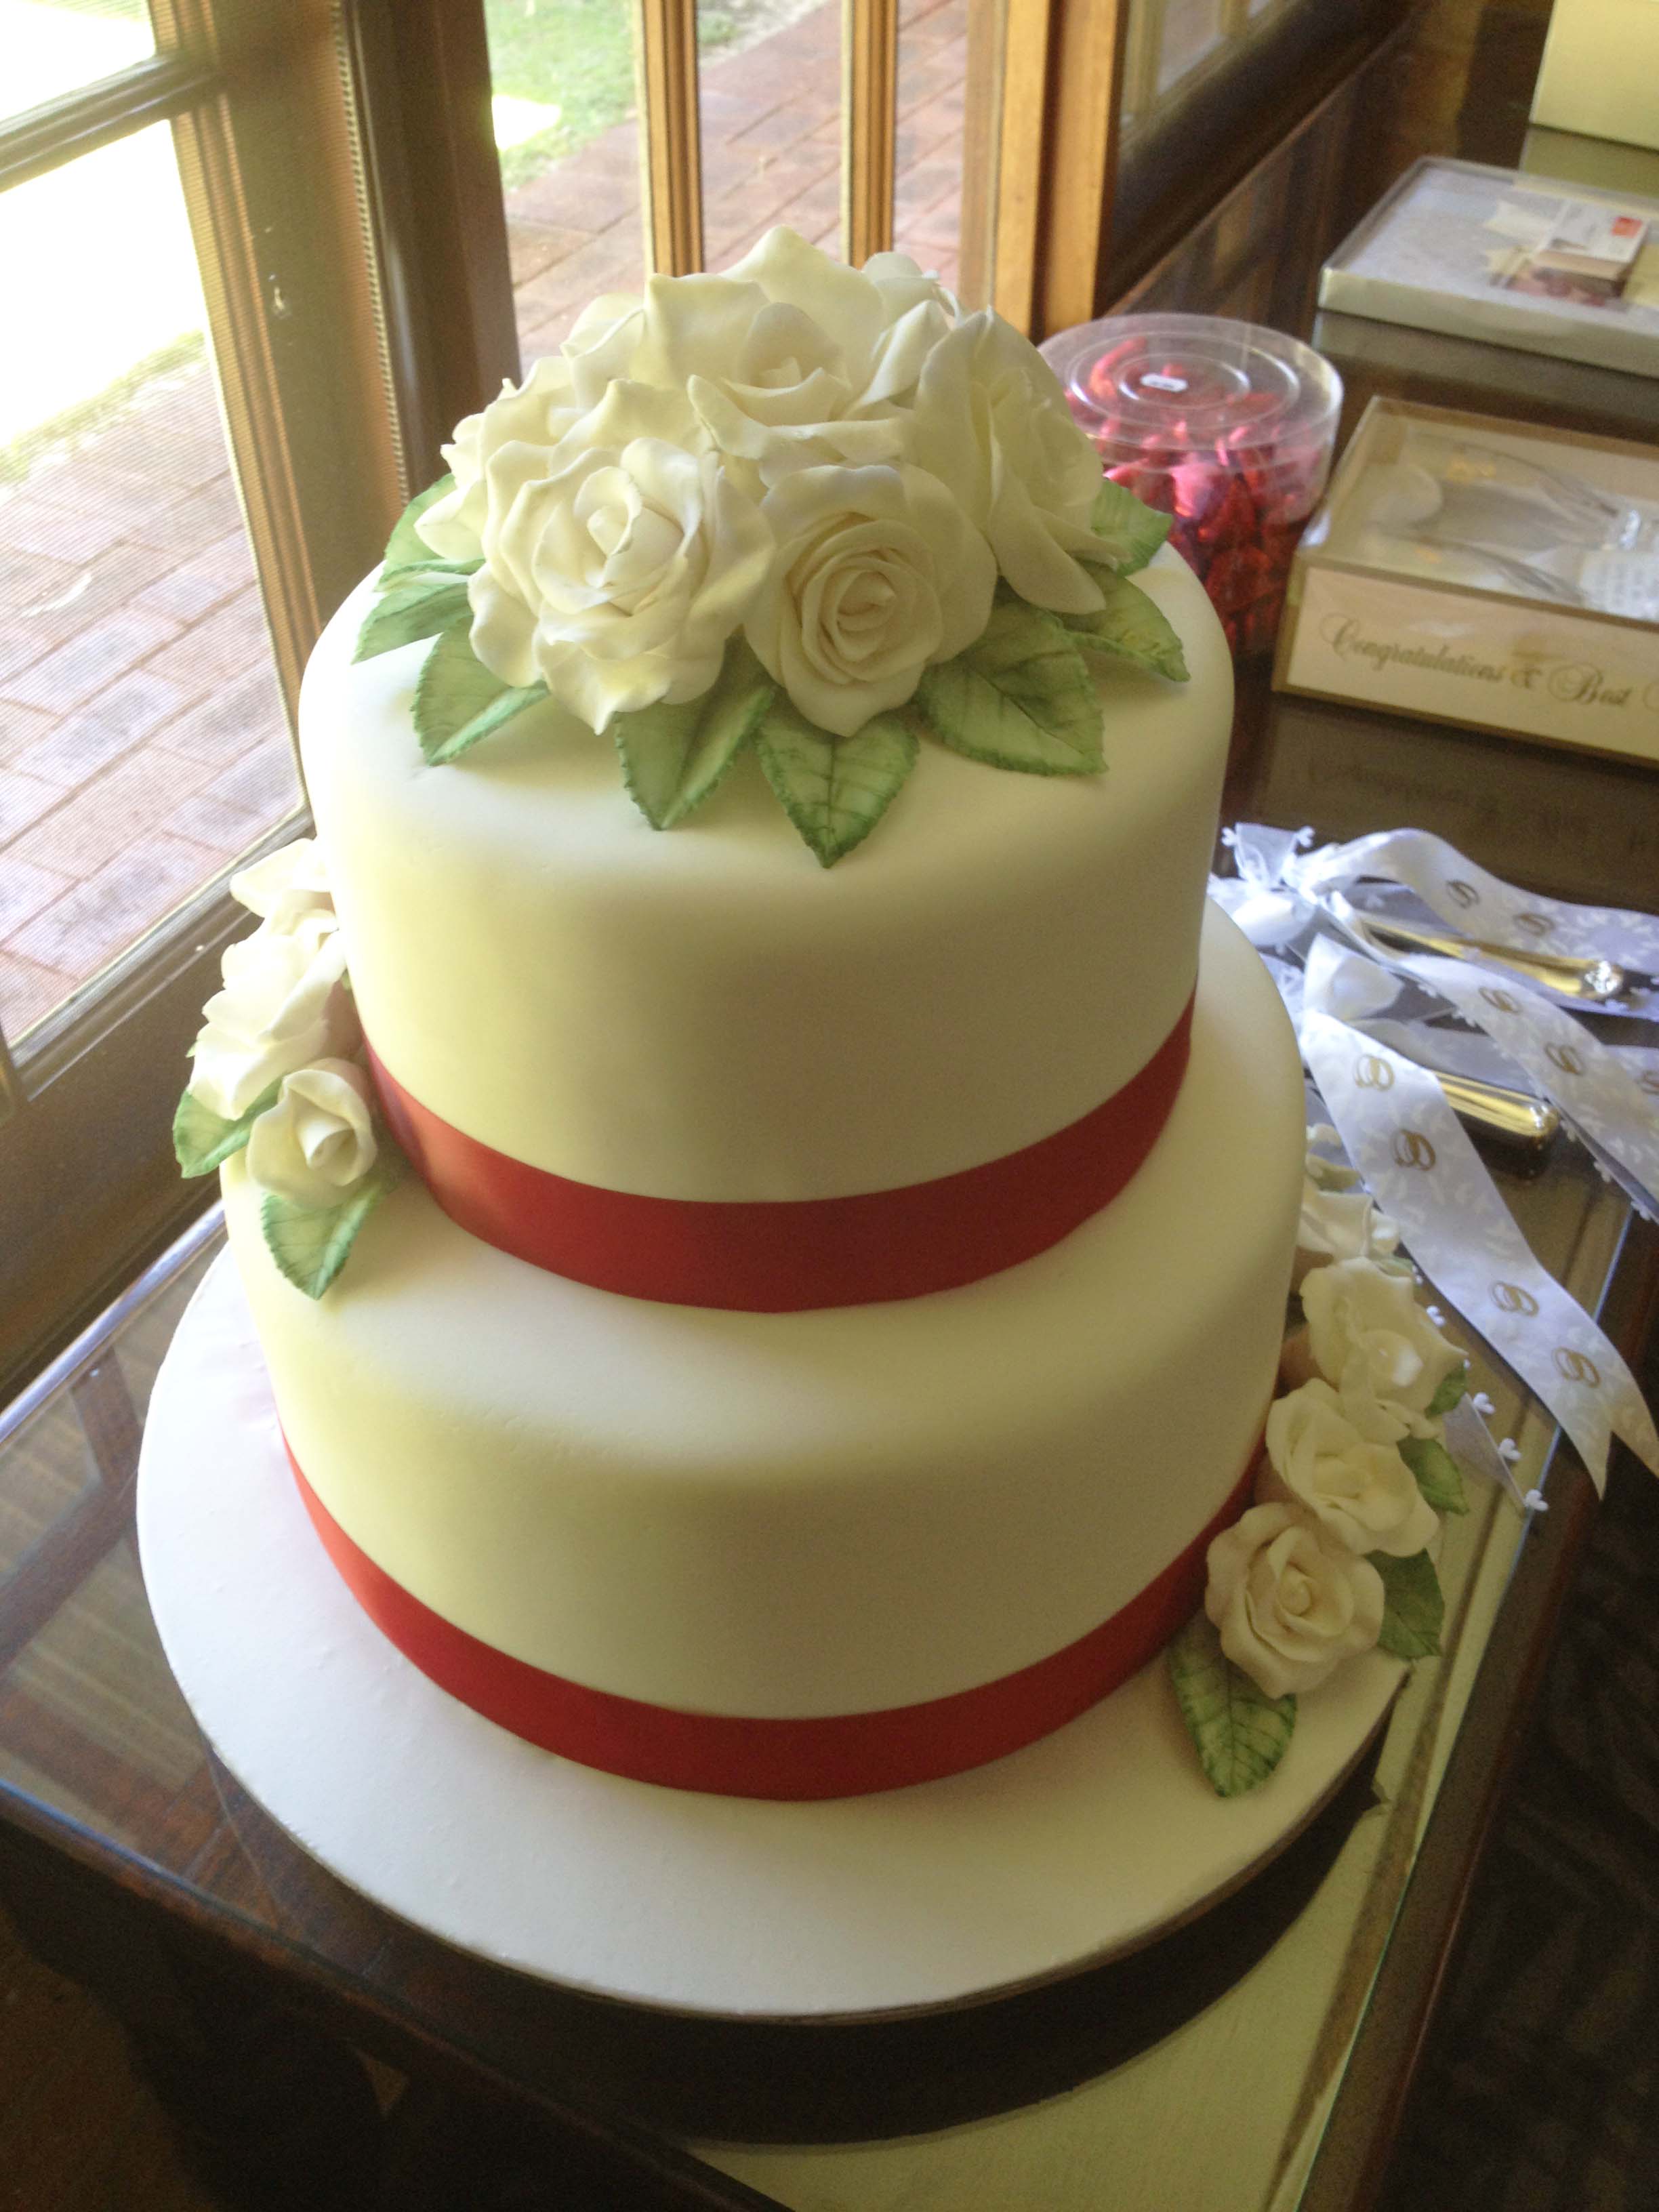
This is my wedding cake. It was the first wedding cake I made on my own. After quite a bit of searching, my wife found a picture of a cake she liked online. We changed the design to suit us, increased the overall scale of the cake, and changed the colours to match our theme.
The cake was layered chocolate with dark chocolate ganache, all covered in ganache and then fondant.
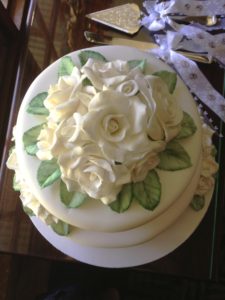
I struggled with the flowers due to insane humidity and evaporative air conditioning… Also, just about any other medium would have been a better option, I now use homemade Mexican paste for flowers.
I ended up going to my parent’s house and making the day before, taking advantage of their good air conditioning…
This was also a few years ago, before I had discovered petal cutters, veiners and before I understood that sugar flowers usually take a few days to make… and petals on bigger flowers need time to dry before assembling… And that a pinch of tylose or CMC or tylose would have conquered the humidity, fixed the texture and set the petals up in about half an hour and removed the struggle…. *sigh*
However I muddled through pretty quickly and I was very happy with the final result, and more importantly so was my wife.
This recipe is great for STRUCTURAL, SIMPLE modelling that needs to be quite tough. Use Mexican paste or fondant for detailed work.
 Modelling paste recipe (Pastillage)
Ingredients
2 teaspoons powdered gelatine – approx 8grams (or 4 leaves of sheet gelatine)
35 ml of water
1 rounded teaspoon (10grams) glucose syrup or corn syrup. (Corn syrup gives a better texture).
One and a half cups (200grams) of pure icing sugar, sifted
Optional: 1/2 teaspoon of cream of tartar will help the paste to set up faster, and helps preserve the mix.
A tiny amount of white vegetable shortening like Crisco will make the mix more manageable, but makes the mix weaker and slower to dry.
This recipe is easier to work with in slightly larger quantities, I recommend making a double or triple mixture.
The paste can be made to set/dry much faster with a pinch of tylose, although this is rarely necessary pretty much only in high humidity. It can also be refreshed with a tiny bit of crisco. Crisco will refresh scaly modelling paste and improve the overall texture. I never used to use vegetable shortening with this, but it improves the usability quite a lot.
Combine gelatine, glucose and water in a small saucepan and heat very gently. The aim is to gently melt all of the gelatine and combine it with the glucose and water to form a perfectly combined and homogeneous mixture. Do not boil or overheat. Use a chopstick or similar implement to stir the mixture very gently, avoid making bubbles or getting gelatine up the sides of the saucepan.
Place half of the sifted icing sugar (3/4 cup) into a small mixing bowl. Make a well in the centre of the icing sugar and pour in the warm gelatine glucose mix. Use a blunt butter knife to mix the icing sugar to a smooth paste. Cover the bowl with cling film and leave to rest at room temperature for at least an hour.
Once rested, knead in the remaining icing sugar bit by bit until you have a smooth clay like modelling paste mixture this will require quite a bit of effort and the mixture will be a bit rough and lumpy, but keep at it, it seems like it will not all combine, but it does… eventually. Place into a plastic bag, or ziplock bag and leave a few hours or overnight in a cool place then knead before using.
After resting a few hours the mixture will be smooth like plasticine. The most important part of this recipe is the resting time. It will be easier to work with if it is warmed very slightly, so pop it in the microwave still in the ziplock bag for a burst or two of 3 – 5 seconds. Like fondant, the modelling paste can be conditioned by working in a very tiny amount of Crisco, but do not work too much in or it can interfere with the hardness of the finished product. If the mixture is too dry and brittle you can work more water into the mixture, just dampen your hands and knead the water through a few times.
The mixture dries out very quickly, so I keep any modelling paste I am not currently using in a sealed ziplock plastic bag, and keep a lightly damp paper towel nearby to cover and keep the pieces I am working with soft and pliable, but generally pastillage is best fir quick modelling not for super fine detailed work. Pieces of modelling paste glue together very well with stiff royal icing.
My best advice is to give it a go. This is a very cheap recipe to make and after making a few batches you will be familiar with how to get the best results for nearly any project that requires modelling paste or sugar paste.
The modelling paste sets hard, almost like fine bone china. Once dried it is structurally very sound and can be painted with liquid colours watered with alcohol for super vibrant colour, or dusted with petal dust and lustres. Flowers made this way will last for years if they are kept away from excessive humidity and bugs.
I like to add vanilla extract, rosewater or other essences to my mixture to give the modelling paste a pleasant fragrance, not that many people would eat sugar paste toppers, but they could eat this and the flavours improve the taste as well.
Recipe Card
- 2 teaspoons powdered gelatine - approx 8grams (or 4 leaves of sheets)
- 35 ml of water
- 1 rounded teaspoon (10grams) glucose syrup or corn syrup. (Corn syrup gives a better texture).
- One and a half cups (200grams) of pure icing sugar, sifted
- Optional: 1/2 teaspoon of cream of tartar will help the paste to set up faster, and helps preserve the mix.
- This recipe is easier to work with in slightly larger quantities, I recommend making a double or triple mixture.
- The modelling paste can be made to set/dry much faster with a pinch of tylose, although this is rarely necessary pretty much only in high humidity. It can also be refreshed with a tiny bit of crisco. Crisco will refresh scaly modelling paste and improve the overall texture. I never used to use vegetable shortening with this, but it improves the usability quite a lot.
- Combine gelatine, glucose and water in a small saucepan and heat very gently. The aim is to gently melt all of the gelatine and combine it with the glucose and water to form a perfectly combined and homogeneous mixture. Do not boil or overheat. Use a chopstick or similar implement to stir the mixture very gently, avoid making bubbles or getting gelatine up the sides of the saucepan.
- Place half of the sifted icing sugar (3/4 cup) into a small mixing bowl. Make a well in the centre of the icing sugar and pour in the warm gelatine glucose mix. Use a blunt butter knife to mix the icing sugar to a smooth paste. Cover the bowl with cling film and leave to rest at room temperature for at least an hour.
- Once rested, knead in the remaining icing sugar bit by bit until you have a smooth clay like modelling paste mixture this will require quite a bit of effort and the mixture will be a bit rough and lumpy, but keep at it, it seems like it will not all combine, but it does... eventually. Place into a plastic bag, or ziplock bag and leave overnight in a cool place then knead before using.
- After resting overnight the mixture will be smooth like plasticine. The most important part of this recipe is the resting time. It will be easier to work with if it is warmed very slightly, so pop it in the microwave still in the ziplock bag for a burst or two of 3 - 5 seconds. Like fondant, the modelling paste can be conditioned by working in a very tiny amount of Crisco, but do not work too much in or it can interfere with the hardness of the finished product.
- The mixture dries out very quickly, so I keep any modelling paste I am not currently using in a sealed ziplock plastic bag, and keep a lightly damp paper towel nearby to cover and keep the pieces I am working with soft and pliable. Pieces of modelling paste glue together very well with stiff royal icing. Royal icing, vodka, water or a thin film of sticky liqueur will glue petals around the modelling paste buds as you are creating them.
- My best advice is to give it a go. This is a very cheap recipe to make and after making a few batches you will be familiar with how to get the best results for nearly any project that requires modelling paste or sugar paste.
- The modelling paste sets hard, almost like fine bone china. Once dried it is structurally very sound and can be painted with liquid colours watered with alcohol for super vibrant colour, or dusted with petal dust and lustres. Flowers made this way will last for years if they are kept away from humidity and bugs.
- I like to add vanilla extract, rosewater or other essences to my mixture to give the modelling paste a pleasant fragrance, not that many people would eat sugar paste toppers, but they could eat this and the flavours improve the taste as well.
2 comments
Hi
I urgently need to make swans with modelling paste. At what time do i use the cream of tartar?
Can i cut the swans just after preparing the modelling paste then leave it to dry for 24 hours?
Author
Yup, just make it leave it to rest an hour then roll and cut the swans.
The cream of tartar just helps with the setting and acts as a preservative, add it in with the icing sugar.
Cut the pieces, dry them completely and they’ll hold up nicely. Don’t move them until they are complete dry.
Make a couple of extra just in case, the pastillage is very strong, but it is also a little brittle once dried.
Hope it goes well.